Puppy or Dog Obedience Training First Steps – Condition a Marker, Capture Sit, Teach “Look”

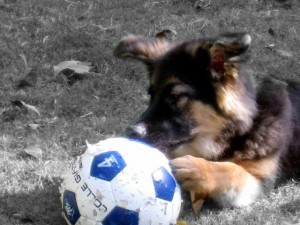
EllieBWBall

Want to start an obedience program for your puppy or dog? You can start as soon as you bring your dog into your family. The first two commands all dogs should learn are “Look”, and “Sit”. Before you begin teaching, it’s helpful to learn a bit about rewards and reward systems. Please visit the START HERE category of posts before you begin.

Conditioning a Reward Marker

The method to establish a conditioned reward marker is to use classical or pavlovian conditioning to pair (or associate) a marker with the primary reinforcer of food.

Regardless of the marker you choose, the steps for conditioning the marker are identical. You only need to condition the marker this one time. Your animal is not asked to perform a behavior during the conditioning process.

Do this when the animal is attending to you and not distracted. Do not speak or touch the animal before, or after, you deliver the marker and the treat.

Remember, a marker can be any signal the animal can perceive. My favorite audible, conditioned reward markers are: the sound of a clicker; the word “good”, and  the letter “X”.

Here’s how to condition a reward marker.

You are not asking the animal to perform any behavior during this process.

In this example, I’ll use an audible marker, the letter X, spoken abruptly, like a sound.

Speak a crisp “X”; give a food treat. Wait until the animal has finished eating the treat. Say “X”; give the animal a food treat. Repeat 3-5 times. Next, capture sit for folded arms by following the instructions below this sentence.

Capture Sit

The first signal (cue for sit) you teach will be visual. The act of folding your arms across your chest will become your first cue for “sit”.  You can teach your puppy the word “sit” after he learns the folded arms cue.

I prefer starting with this visual signal for several reasons. The primary reason is because folded arms and hidden hands discourage jumping.

Dogs jump up because we touch them with our hands. Dangling and moving hands entice dogs to jump.

Folding your hands out of sight sends a signal to your puppy that you are not likely to touch.

In addition it makes it very difficult for clients to repeat the signal over and over, as they do when using a verbal command.

Another reason I use the “folded arms” visual command is because it helps clients control their behaviors. Most people automatically reach and touch a cute, jumping puppy, without thinking.

It seems we humans have an automatic urge to pet or touch puppies that jump up to greet us. This teaches puppies to jump up for greetings.

The folded arms cue is easy for anyone to perform and appears relatively the same to the dog, no matter who is giving the command. This is helpful when you start asking friends and neighbors to ask your dog to sit.

Ask 3 people to say “sit” to your dog. You will witness 3 very different techniques. Some will bark the command as if this will make it happen quicker; others will add meaningless words to the command, and some may tilt their heads forward or swing their arms.

All these additional actions may confuse the dog, because the dog is very likely to process voice tone, motions and body language as the cue.

The delivery of a visual, folded-arms cue is less likely to be clouded by voice tones and body language, since the voice is absent and the body language is the cue!

Here’s how I usually teach a dog to sit on cue via the capture method.

Do not say “sit” or speak any other words during this teaching session. The only sound you will make is the sound of your conditioned marker, the instant your dog’s bottom touches the floor.

Go to a quiet location where your dog will not be distracted.

Attach a leash and instead of holding the end, just drop it on the floor.

If the dog jumps or decides to walk away, you can step on the leash to prevent either of these behaviors.

Stand a couple of feet away from your dog.

Do not speak to your dog, just give your dog a small food treat. Do this three times. Now you have your dog’s attention!

Fold your arms across your chest and tuck your hands underneath your armpits.

Do not speak, just smile at your dog and wait until he sits.

Mark the instant his rump hits the floor by delivering your reward marker. Give him a treat by tossing in on the floor so that he must get out of the sit position to get the treat. Do not praise or talk to your dog.

As soon as your dog finishes the treat and looks at you, fold your arms across your chest, remain silent and wait. He will sit. Mark the instant his rump hits the floor. Give him a treat.

Repeat 3-5 times.

At the end of this quick session, you can talk and play with your dog. Now you can use the act of folding your arms across your chest as a silent signal for Sit!

To teach your dog the word “sit” means the same as the folded arms, visit this page.

Troubleshooting Sit for Folded Arms

Attention-on-Cue, While Standing

The goal is teach the dog to look towards you on command. Attention on Cue is helpful when you are not interacting with the dog but do wish to start interacting. It is helpful if the dog gets distracted and you want his attention.

Teach your dog to attend to you when you say “now”, “chickie”, “hey”, “look”, “hup”, “turn”, or whatever short word you choose.

I do not use the dog’s name for the attention-on-cue signal.

The signal (command or cue) for attention should be unique! The dog hears his or her name countless times and it doesn’t necessarily mean “Look towards me, I will pay you”.

In order to increase behaviors using rewards, first you must get the behavior.

The recipe is for teaching is:

  • set up the environment to get the behavior
  • mark and reinforce the behavior
  • practice in many areas while adding distractions

For this exercise, we’ll use nothing but the signal and food to initially get the behavior to occur.

Then we’ll use the marker to bring attention to (and reinforce) the behavior of looking towards us when we give the cue.

We’ll follow the marker with food treats the first few trials.

Once the dog learns what is expected of him or her, we’ll mark the instant of success and deliver FAT as a reward for looking when we give the signal.

Get the Behavior

Your dog can be on a leash or not. I like to do it off lead in a secure, small area, but if that’s not available to you, attach a 6 foot leash.

It’s okay if other people are nearby, but you don’t need distractions for this step.  If other people are present, just ask them to stand quietly.

With your dog nearby, speak your “attention signal” and immediately toss or hand your dog a treat (unless he or she is jumping up on you or performing some other rude or obnoxious behaviors). Say the signal, deliver a treat. No markers are used in this step. Repeat 2 times for a total of 3 trials. By now your dog should be focused on you. If not, discontinue the session and move to a quieter area, or choose a higher value food treat and try again.

Mark and Reinforce the Behavior

You might need a very small distraction for this step. Ask a family member to stand nearby, within sight of your dog. Instruct them to tap with their shoe, make a small noise, or whatever it takes, to momentarily attract the dog’s attention towards them.

Wait until your dog is close by, but not looking directly at you. Speak the cue and watch closely. Mark the instant he or she begins to turn his or her head towards you. Toss your dog a treat. Do this 2 more times for a total of 3 trials.

Behavior will be Repeated

Practice “attention-on-cue” at odd times throughout the day, inside the house, in any room that is relatively quiet.

Ask for the behavior 3-5 times during short time periods at different times of day, in different rooms.

Once your dog is obeying this command in rooms without distractions, add distractions by asking a family member to make some sort of noise or slight motion.

Once your dog is obeying, while inside the house with distractions, it’s time to practice outside. Choose quieter areas at first. Attach a leash and go to your patio, yard or any other familiar area.  After you can succeed in these areas, go to other places with more distractions.

Randomly ask for the behavior at odd times when you are not conducting a “training session”. Your goal is to practice this behavior in so many different areas, with so many different creative distractions, that your dog will always look when you give the command!

Happy Training!
Alan J Turner – Companion Animal Behavior Counselor and Trainer
Memphis, Collierville, Germantown Private and Group Dog Training
Fear, Aggression,Anxiety, et cetera

FREE – Dog Won’t Come? Teach Your Dog to Come Bump Your Target

criscojailPlease read Start Here AA-1 through AA-5 before you teach your dog to target.

Crisco, the turbo Jack Russell Terrier in the picture, will almost always come when called. Crisco has been very well trained by her owner via the use of targets!

Here are some thoughts about targets introduced to me by Kayce Cover, B.S., M.A.

Targets give the dog critical information about where success will take place. Examples of targets are a simple wooden dowel with a piece of tape on one end for contrast, your hand, extended fingers, or other items such as a business card, ink pen, plastic lid from small food container, piece of tape on the wall, dot of light from a laser pointer, etc.. You can purchase a target stick from pet supply stores.

Many trainers use targets to teach service dogs how to operate light switches, press doorbells, open doors, pick up items, et cetera. The dog is taught to go to the target, bump the target with his nose (or any other body part) maintain contact with the target, sit / lay on the target, pick up the item touching the target, or any number of behaviors, depending on the type of target and the application.

The use of target(s) is an excellent method to teach motion behaviors or to teach the dog where a behavior should occur.

Simple applications for target sticks are teaching a dog to spin and to heel.

Target Touch

Here’s how to teach your dog to bump a two finger target. To form a two-finger target, extend your index and middle fingers and tuck your ring finger and little finger into your palm with your thumb.

You will present the two-finger target on a plane, horizontal to the floor, as if you are pointing to someone next to you. The dog will touch the outside or knuckle side of the target.

Say “Touch” and immediately position the end of the target one inch from your dog’s nose. He will sniff it.  Do not move your target to touch his nose. He should come to you!

Mark the instant (with your conditioned marker) he touches your two finger target with his nose and immediately withdraw your target. Deliver a reward. Repeat three times, but place the target a bit farther away and to the left or right of your dog’s nose on trials 2 and 3. Now you can use the two-finger, nose target, to guide your dog into position.

Target Here – Foster a Partnership

The “touch” exercise is much more than a simple command. It is a very clear method to tell your dog what you’d like him to do and exactly where success will take place. It is a powerful tool for building an attitude of cooperation, a partnership.

The target provides a visual focal point, a precise point in space, where a behavior is to take place.

Using a target is one method to recall your dog. To use it for a come command, do this. Instead of saying “touch”, say “here” and then present your two finger target a few inches from your dog’s nose. Practice “here” at various distances in very short sessions. I usually practice this command 3-5 times during a short practice session.

I view “here” as a tool for nurturing a senior – junior partnership with Bentley. When I ask him to target, I’m really holding a two way conversation about cooperation.

I’m asking Bentley – “Hey Bent, I’d like you to come over here and bump my target with your nose. Do you understand what I want you to do? Do you understand where success will take place? Do you understand that I will pay you for your cooperation? Are you willing to cooperate? “

Bentley races over to bump my target. He’s replying, “Hey Alan, I know what you want me to do. I know where success will take place. I know you’re going to pay me. I’m willing to cooperate.”

Troubleshooting Target Here

Teaching your dog to touch your two finger target can be frustrating! Sometimes the dog will bite your fingers, or just quit targeting altogether.

If your dog is biting your target, check for these common errors. Review your timing and target placement. You should mark the instant he touches the target, not one second afterwards. Are you withdrawing your target immediately after you mark the instant he touches it? If you leave your target in place after the marker, your dog may mouth or bite the target. It’s best to remove your target immediately after you mark the touch.

If your dog sometimes ignores the target, review the placement of the target. Position the target nose height or lower.   The target should be horizontal to the floor (as if you are pointing to something next to you).

What are your actions after he bumps the target? Are you moving the target towards the dog (thus bumping him right before he reaches the target)? Do you end his fun or mark the instant and give a reward?

Some dogs lose interest if you repeat the exercise more than 2-3 times during a short session.

Print This Post Print This Post

Happy Training!

Alan J Turner – Companion Animal Behavior Counselor & Trainer, Canine Specialization
Private and Group Dog Obedience Training
Member: APDT

How to Teach your Dog to Come when you Blow a Whistle

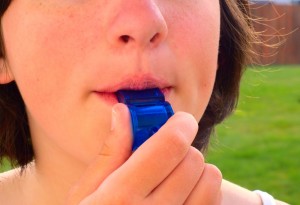
bigstockphoto_girl_blowing_blue_whistle_38094411Whistle Come

There are many different methods to teach dogs to come when called. Here is an easy way to teach your dog to come when you blow a whistle. You may be creative with your whistle signal. For example, you could blow a short toot followed by a long toot.

Access this and other training articles quickly and easily on my new iphone / ipad / android FREE app

Get a whistle.  Any type of whistle will do. Sporting goods stores stock a selection of whistles. Walmart and Target have some in their sporting goods sections.

Use special treats for this exercise, not the normal treats you use for training. Small pieces of chicken, ham, cheese or turkey work well. The idea is to choose a treat that your dog will LOVE! Choose a unique and delicious treat that your dog never ever gets any other times!

From this point forward, you will only blow the whistle during whistle come exercises.

IMPORTANT:Do not use the whistle to call your dog when he or she is misbehaving!  It will increase the misbehaviors! THEREFORE , if your dog is digging or barking or misbehaving, first get your dog’s attention, then blow the whistle when he or she is looking at you.

Do not speak to your dog, or touch your dog during Steps 1 and 2.

Step 1) Go to your den or family room and have your dog next to you. Blow your whistle and hand your dog a treat. Wait a couple of seconds, blow your whistle and give your dog a treat. Repeat 4-6 times. You are finished now. Put the whistle away.

Wait 3-5 minutes and repeat the sequence in another room of your house. Do this in 3 or more different rooms during 3 or more different sessions.

Step 2) Go to an outside area and have your dog on a short leash next to you. Blow your whistle and hand your dog a treat. Wait a couple of seconds, blow your whistle and give your dog a treat. Repeat 4-6 times. You are finished now. Put the whistle away.

Wait 3-5 minutes and repeat the sequence in another area outside. Do this in 3 or more different outside areas during 3 or more different sessions.

Step 3) Practice in the front yard or other unfenced areas with your dog on a 10-25 foot line. Practice in 3 or more different outside areas during 3 or more different sessions. When your dog comes, hand him or her a treat. Praise your dog! Toss a ball! Play with your dog!

Step 4) Go to a fenced area outside with your dog off leash. Let your dog wander around for 5 minutes. Blow your whistle and wait. When your dog comes, hand him or her a treat. Praise your dog! Toss a ball! Play with your dog!

After several sessions, vary the rewards.  Use treats sometimes, or use praise and play as rewards. Soon, your dog will always come when you whistle!

Access this and other training articles quickly and easily on my new iphone / ipad / android FREE app. Get the app here: https://alanturner.cardtapp.com/

IMPORTANT:Do not use the whistle to call your dog when he or she is misbehaving! It will increase the misbehaviors! THEREFORE , if your dog is digging or barking or misbehaving, first get your dog’s attention, then blow the whistle when he or she is looking at you.
Print This Post Print This Post

Happy Training!


AT

Alan J Turner, Companion Animal Behavior Counselor & Trainer – Canine Specialization

Private and Group Dog Training in Memphis,

Owner: How’s Bentley –