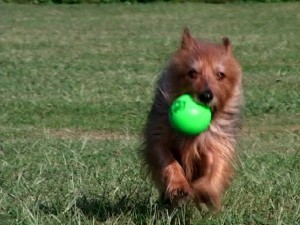
Description:
The dog releases an item from his or her mouth.
Function:
Final step in “Fetch”, or anytime you want the dog to release an item from his or her mouth. When teaching fetch, teach give or drop first, and the other steps like carrying the ball and finding the ball will naturally fall into place.
Before you begin training your dog, you’ll need to learn a bit about communication and motivation. Please visit the Dog Training Start Here Category. There you will learn about markers and rewards, two excellent topics for communicating and motivating! A prerequisite for “stay” is “Attention on Cue”. It doesn’t hurt if your dog already knows “Sit” too!
Considerations / Prerequisites:
Where do you want to dog to place the item? – on the floor, on the table, in your lap, in your hand, in a basket, in another’s hand, in another room? Do you want to dog to sit or lie down before the drop?
Some dogs quit “holding” items after 2 or 3 trials. You may need to teach “Hold”, “Sit”, “Place”, Down”, “Leave-It”, or, try again later.
The balance between the value of the item and the value of the treat is important. If your dog is not dropping the item before you open your fist by trial 5, reconsider your item and treat choices. Begin practicing with a tennis ball or other fetch toy and use high value treats. When your dog “catches on”, use other items that do not belong to the dog and lesser value treats!
Your task is to mark (or click) the instant the dog releases the item. When following the instructions, be ready to click regardless of where in the sequence the dog releases the item. Many dogs will release before you finish the sequence of steps.
These instructions are a sort of guide. You can adapt the instructions to fit you and your dog. You may not need all the steps. The goal of this post is to teach a concept. The general concept is:
- Get the Behavior to Occur
- Mark the Instant it Occurs
- Deliver some sort of reward
Visual Cue: Handler holds his or her fist directly in front of dog’s nose.
Audible Cue: Handler speaks, “Drop” or “Give”.
Teach Drop
Trial 1:
- Say “Drop”, pause 1 second.
- Present fist with treat (visual cue), pause 1 second.
- Push your fist forward (palm down) until your fist is directly in front of the dog’s nose, pause 1 second.
- Rotate your fist until it is palm up, pause 1 second.
- Open fist to reveal treat. Mark the instant the dog releases the item. Give treat.
- Pick up item and give it back to the dog.
Trial 2:
- Say “Drop”, pause 2 seconds.
- Present fist with treat (visual cue), pause 2 seconds.
- Push your fist forward (palm down) until your fist is directly in front of the dog’s nose, pause 2 seconds.
- Rotate your fist until it is palm up, pause 2 seconds.
- Open fist to reveal treat. Mark the instant the dog releases the item. Give treat.
- Pick up item and give it back to the dog.
Trial 3:
- Say “Drop”, pause 3 seconds.
- Present fist with treat (visual cue), pause 3 seconds.
- Push your fist forward (palm down) until your fist is directly in front of the dog’s nose, pause 3 seconds.
- Rotate your fist until it is palm up, pause 3 seconds.
- Open fist to reveal treat. Mark the instant the dog releases the item. Give treat.
- Pick up item and give it back to the dog.
Trial 4 -xx:
Follow the same sequence, but omit the treat in your fist on trials 4 and above. Add 1 second to the sequence of pauses. Most dogs learn this very quickly, and will drop when you say “drop” within 2-3 trials. That’s okay if your dog doesn’t, just add 1 second every new trial. For example, if you make it to Trial 7, you will have 7 second pauses in the trial.

2 Replies to “How to Teach your Dog to Drop or Give”
Comments are closed.