Troubleshooting: Capture Sit for Folded Arms

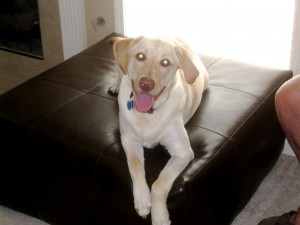
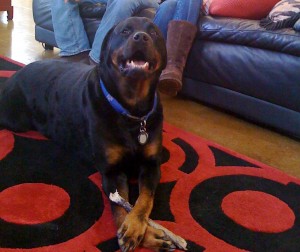
Black DogTruth is, most dogs default to sit when they reach the impasse, as presented during the ” capture sit for folded arms” exercise.

The leash is a tool to reduce your dog’s choices. Ideally, the dog will not feel any pressure from the leash, unless he or she jumps up. The short leash will abruptly stop the dog’s upward progress, and the dog’s attempts to jump up will fail. Most dogs stop trying to jump up, after a few of these failures.

Stepping on the leash, reduces vertical and horizontal territory. Standing upright, with arms folded, eliminates stimuli from you, the handler. The dogs only have a few choices of what to do with their bodies.

If your dog does not sit after a minute or so, consider the following points.

You can use your body language to help. To do this, lean towards your pup with your upper body or take a very small step towards the puppy. He will sit.

Immediately straighten your upper body (remove the spatial pressure you added by leaning forward) and immediately mark the instant his rump hits the floor. Give him a treat. Say nothing.

Is your dog looking at you? If not, go to a different area, a place with fewer distractions.  Are you stepping on the leash, so your dog cannot jump up or move away? If you are stepping on the leash, does the dog have enough slack in the leash to sit?

If you are still having problems getting your dog to sit for folded arms, discontinue the exercise and try again later.

Happy Training!

Alan J Turner –  Dog Trainer – How’s Bentley – Memphis TN

Private and Group Dog Training Services

Group Dog Mini Course

Do-It-Yourself, Internet dog training basics

Easy & Lazy: Sit in a Chair & Teach Your Dog or Puppy to Lie Down!

LABCaptureOf all the methods to teach a dog to lie down, capturing is the easiest, but it is seldom used because people do not understand or believe it will be effective.

Access this and other training articles quickly and easily on my new iphone / ipad / android FREE app

Capture is when you set up the environment for the behavior to occur, or just wait for the dog to perform the behavior, then you mark and deliver a treat. You don’t say anything, or offer a food lure, or provide any other input before the dog performs the target behavior.

Another reason my clients are hesitant to try and capture the down is because most people are determined to insert the word “down” when first teaching the behavior.

Telling dogs “down” does nothing to help the dogs learn the behavior. If anything it sends the dogs misinformation, because most people repeat the word, as if the word will help the dog to lie down.

Once the dog learns the behavior, you can slip the cue or command into the sequence, immediately before the dog performs the behavior. You’ll teach the dog the behavior first, then you teach the dog a command for the behavior.

You will need to condition a reward marker to use the capture method. If you are not familiar with reward markers, or capturing behaviors, please visit this page to learn how to condition an instant reward marker, and capture sit for folded arms, BEFORE you capture down.

Dogs sit numerous times every day, therefore “capture sit for folded arms” is very easy and effective. The exercise is as much a teaching exercise for the handler as it is for the dog. The handler learns about timing and how to teach a dog without a food lure, and without offering any physical input. The dog learns that he or she “makes” the marker occur. Once a dog understands this concept, you are ready to capture other, less frequent behaviors.

Assuming you have conditioned a reward marker, here are the steps to capture down. Teach down when your puppy dog is more likely to lie down, such as late in the evening or after exercise.

I like to do this when I am seated and watching TV, because I am lazy. 🙂

With your dog in the same area as you, you watch and wait for the dog to lie down, you mark the instant the dog’s belly touches the floor. Then toss a food treat on the floor, in between your dog’s front legs. Do this several times during a 2 hour period.

Do not speak to or touch your dog before, or immediately after he or she lies down. The only relevant events are belly touch floor, sound of the marker, food treat.

It may take more than one session of capturing the down before your dog catches on.

You can add the verbal command after your dog learns the behavior. You’ll know when your dog has “got it”. He or she will come over to you and plop down. When you notice this, do not mark the belly touch, just look at your dog. If your dog looks at you with that “hey stoooopid, I did it, where’s the marker and treat?”, then you can speak the word down, before the dog lies down. Repeat a few times, but now say the word “down” before your dog lies down. There you have it!

Happy Training!
Alan J Turner – Companion Animal Behavior Counselor and Trainer, Canine Specialization
How’s Bentley – Memphis, Collierville, Germantown TN
21st Century Canine Relationship Solutions
Group Dog Obedience Classes
Private Dog Training in Memphis TN
Reactive Dog Specialist

Teach Your Dog Commands for Moving Through Doorways – Inside / Outside

Bent_InsideInside – Outside

Description: The dog moves through an open door on command, on and off leash.

Function: Teach the dog to move through doors on command.

Prerequisites: Condition a reward marker; “Sit”, “Attention – Without Cue”;

Target Here”

Time: 4 Days

Many of my clients complain that their dogs will not enter and exit their houses on command. The dogs ignore their owners, stand and look at their owners, or run away.

Off leash obedience is an advanced skill, even when the dog is in a fenced area. Before you can expect your dog to obey when he or she is 50 feet away, first you should practice when the dog is on a short leash, then a long line.

There are many reasons a dog might not be motivated to obey. Some dogs may prefer the inside because of the weather outside. If an owner has a history of calling their dog inside, placing the dog in  the crate, and leaving the house, the dog may remember and be hesitant to come inside. Other dogs like to chase critters and bark at noises outside.

Regardless of the underlying reasons, training and practice is the solution. I use the “Inside – Outside” game to teach dogs to move through doorways. To play the game, follow these suggestions.

First Day:

Place your dog on a 6 foot leash.

Stand inside your house next to an exit door.

Tell your dog to sit. Praise your dog for the sit.

Tell your dog, “Outside”.

Open the door and walk outside. Don’t pull that rascal through the door. Make some “kissy” noises to charm your dog as you and your dog walk through the door to the outside. Mark the instant he or she passes through the doorway.

Close the door.

Drop the leash.

Toss a treat on the ground outside, several feet away from the door.

Pick up the leash.

Tell your dog to sit. Praise your dog for the sit.

Tell your dog, “Inside”.

Open the door and walk inside. Don’t pull that rascal through the door. Use your voice to charm your dog as you and your dog walk through the door to the inside.

Mark the instant he or she passes through the doorway.

Close the door.

Drop the leash.

Toss a treat on the floor inside, several feet away from the door.

Repeat the sequence 2 more times for a total of 6 trials (3 Outside – 3 Inside) during each practice session. Hold 3 of these practice sessions every day. End each session with a walk, a game of fetch, or any of your dog’s favorite play activities.

Next Day:

Play the Inside – Outside game 3 times each day for a total of 18 trials. Practice at each door you plan to enter and exit with your dog during each session. For example, if you use 2 doors, practice the sequence 2 times at 1 door and 1 time at the other door. If you have 3 doors, practice one sequence at each door.

Third Day:

Stand inside your house next to an exit door to a fenced area, with no leash attached.

Call your dog, using the two-finger target.

Mark the instant your dog touches the target and immediately tell your dog to sit. Praise your dog for the sit.

Tell your dog, “Outside”.

Open the door.

Step into the door opening.

Your dog will pass through the door.

Mark the instant he or she passes through the doorway.

Toss a treat on the ground outside, several feet away from the door.

Close the door. Your dog will be on the outside and you will be on the inside.

Immediately walk outside. Close the door.

Call your dog, using the two-finger target.

Mark the instant your dog touches the target and immediately tell your dog to sit. Praise your dog for the sit.

Open the door and tell your dog, “Inside”.

Step into the door opening. Your dog will pass through the door. Mark the instant he or she passes through the doorway.

Toss a treat on the floor inside, several feet away from the door. Close the door. Your dog will be on the inside and you will be on the outside.

Repeat the sequence 2 more times for a total of 6 trials (3 Outside – 3 Inside) during each practice session. Hold 3 of these practice sessions every day. End each session with a walk, a game of fetch, or any of your dog’s favorite play activities.

Fourth Day:

Fade the marker and the food treat, and reduce your motion of moving into the doorway. When your dog moves through the door, offer verbal praise and toss a ball or a toy instead of a treat. You can step inside or outside with your dog, or not.

Stand inside your house next to an exit door to a fenced area, with no leash attached.

Tell your dog to sit. Praise your dog for the sit.

Tell your dog, “Outside”.

Open the door.

Your dog will pass through the door.

Praise your dog.

Toss a ball or toy outside, several feet away from the door.

Close the door. Your dog will be on the outside and you will be on the inside.

Open the door and walk outside. Close the door.

Tell your dog to sit. Praise your dog for the sit.

Open the door and tell your dog, “Inside”.

Your dog will pass through the door.

Close the door. Your dog will be on the inside and you will be on the outside.

Repeat the sequence 2 more times for a total of 6 trials (3 Outside – 3 Inside) during each practice session. Hold 3 of these practice sessions every day. End each session with a walk, a game of fetch, or any of your dog’s favorite play activities.


Does Your Dog or Puppy Pull on Walks? Start with the Basics. Capture & Teach Attention!

bentleyfielddisc1Dogs and puppies pull during walks because, from their points of view, it works. They get to move forward when they feel the pressure of the collar or harness against their bodies. Every time your dog pulls while walking on lead, he or she is learning to pull. The behavior is being fertilized! It will grow and become strong. Yikes!

There are many methods and tools one might use to teach a dog or puppy to walk nicely on a leash. Many people are content to only “halfway” address the behavior. This is evident by the number of people who use pinch collars, choke collars, Gentle Leader head collars, no-pull harnesses, Weiss Walkie, or any other STOP pulling equipment, forever. Their dogs will not walk nicely unless the threat of discomfort is present via the fitted equipment. The equipment is a condition for “walking nicely” behavior. Without the equipment, the dog pulls. With the equipment, the dog heels by the handler’s side or walks on a loose lead.

What I meant by “halfway” is this: the tools and equipment, just like verbal corrections and jerking the leash, are designed to STOP pulling. That’s okay by me; you can use the equipment forever and your dog will not pull. But, do not confuse that with teaching your dog to walk nicely or to heel. What you have done is convinced your dog to walk nicely by the threat of equipment pressure! My goal is to use the equipment as a temporary aid, while I teach the dog to walk nicely. Then I can use the equipment or not, depending on the environment.

My current favorite tool for controlling an exuberant dog during walks is the Canny Collar.

If you want to discontinue the use of equipment, you have two target goals. One is to STOP the pulling behavior, the other is to START “walking nicely” behavior!

I know what you are thinking, “my dog always pulls on walks; how can I use rewards to increase good behaviors if the dog never ever walks without pulling?”

Glad you asked. Start with the basics. Teach your dog to stand with you on a loose lead, before you teach your dog to walk without pulling.

First you’ll teach your dog to stand near to you, with a loose lead, before you ever start walking. You will teach a command that means, “look towards me, I will pay you!” I call this Attention on Cue – while standing”.

Next, you will practice “Attention-on-cue” in many different locations, while adding distractions. Then you practice “Attention on Cue – while walking”. Take a step or two with your dog and ask for the look.

Finally you teach your dog “Attention without Cue – while standing”, then “Attention without Cue – while walking”. “Attention without cue” is when your dog checks in or looks at you voluntarily, without any commands or cues from you.

Once your dog has mastered “Attention”, you can start working on loose lead walking or heel. With a bit of time and effort (and the knowledge to teach attention), you can discard your pinch collar, choke collar, Gentle Leader head collar, et cetera!

Visit this page to learn how to teach your dog Attention-on-Cue, While Standing.

Attention-on-Cue, While Walking

After your dog has mastered Attention-on-Cue, While Standing, it’s time to add the distraction of walking.

This skill is a component of “walk-on-loose-lead”. It would be better to play without a leash, in a hall or narrow walkway, until your dog learns the game. Then you can practice in the back yard or on leash in public.

I taught Bentley this behavior on my narrow, front patio walkway. I started the game at the gate, so Bentley had only one direction to walk.


Get some high-value treats. Start at the end of the hall or narrow walkway. Practice “attention-on-cue, while standing”. Perform 2 to 3 trials.

Then somehow get your dog to walk ahead of you as you both start walking. I told Bentley “this way” and started walking forward, but you don’t necessarily need a cue. Just start walking and your dog will probably start walking too.

As soon as your dog is “a dog’s length” ahead, give your attention-on-cue command. Mark the instant your dog turns his or her head towards you.

Walk back to the starting point (end of hall) to deliver the treat. This is called one cycle or trial. The cycle began when you started walking and ended after you delivered the treat.

Repeat, but on the next trial, let your dog get 2 dog lengths ahead before you give the cue.

On the subsequent trials, you’ll increase the distance by one dog length each trial. For example, your dog will be 5 dog lengths ahead before you give the command during cycle 5.

Increase the distance during each trial until your dog will look back towards you when he or he or she is 8-10 feet ahead.

.

The distance change from cycle to cycle can be very small or large. In the example, I used one dog length as starting distance and increased the distance by one dog length each cycle. You might start at one foot or even 1″ . . . whatever it takes to get the behavior.

Once your dog will perform without distractions, ask someone to stand in the hall while you practice. Then ask them to move their arms, tap their feet, sing, et cetera, while you practice. The goal is for them to become just a wee bit more exciting from cycle to cycle.

After your dog has mastered the behavior in the hall or narrow walkway with distractions, move to a different area with different distractions.

Even though your dog performs well inside, with minimal distractions, be prepared to repeat the beginning steps of the exercise whenever you add distractions.

Attention – Without Cue

Attention-without-cue is helpful when you are interacting with the dog and you want the dog to ignore other distractions and stay connected to you. This is a prerequisite for loose lead walking.

Here’s how to teach the dog to stay connected to you.

This exercise places the responsibility of ‘staying connected’ on the dog, not the handler.

Place your dog on a 6 foot leash. Stand quietly in one area. Your dog will sniff and explore. Be patient. Say nothing. Wait until the dog looks at you.

MARK the instant the dog turns his head towards you and then deliver a treat. Repeat until the dog is constantly looking at you. When this occurs, move to a different location a few feet away. The dog will be momentarily distracted. Repeat the process in the new location. Do this in 3 different locations each session. Hold 3 sessions each day for optimal results!

Once the dog gets better at volunteering the look, repeat the process with a longer leash. A longer leash gives the dog more choices of things to explore, which is the next grade or level of distraction.

As you practice this behavior, you can add other distractions like people standing or walking, other dogs, et cetera.

Once your dog is voluntarily checking in while you are standing, wait until your dog is not looking and take a step or two. If he or she moves with you or turns towards you, mark the instant he starts to move. This is a great way to begin teaching your dog to walk nicely on a lead.


Happy Training!

Alan J Turner – Companion Animal Behavior Counselor & Trainer, Canine Specialization

Private and Group Dog Training in Memphis TN

Owner: How’s Bentley

Puppy or Dog Obedience Training First Steps – Condition a Marker, Capture Sit, Teach “Look”

EllieBWBall

Want to start an obedience program for your puppy or dog? You can start as soon as you bring your dog into your family. The first two commands all dogs should learn are “Look”, and “Sit”. Before you begin teaching, it’s helpful to learn a bit about rewards and reward systems. Please visit the START HERE category of posts before you begin.

Conditioning a Reward Marker

The method to establish a conditioned reward marker is to use classical or pavlovian conditioning to pair (or associate) a marker with the primary reinforcer of food.

Regardless of the marker you choose, the steps for conditioning the marker are identical. You only need to condition the marker this one time. Your animal is not asked to perform a behavior during the conditioning process.

Do this when the animal is attending to you and not distracted. Do not speak or touch the animal before, or after, you deliver the marker and the treat.

Remember, a marker can be any signal the animal can perceive. My favorite audible, conditioned reward markers are: the sound of a clicker; the word “good”, and  the letter “X”.

Here’s how to condition a reward marker.

You are not asking the animal to perform any behavior during this process.

In this example, I’ll use an audible marker, the letter X, spoken abruptly, like a sound.

Speak a crisp “X”; give a food treat. Wait until the animal has finished eating the treat. Say “X”; give the animal a food treat. Repeat 3-5 times. Next, capture sit for folded arms by following the instructions below this sentence.

Capture Sit

The first signal (cue for sit) you teach will be visual. The act of folding your arms across your chest will become your first cue for “sit”.  You can teach your puppy the word “sit” after he learns the folded arms cue.

I prefer starting with this visual signal for several reasons. The primary reason is because folded arms and hidden hands discourage jumping.

Dogs jump up because we touch them with our hands. Dangling and moving hands entice dogs to jump.

Folding your hands out of sight sends a signal to your puppy that you are not likely to touch.

In addition it makes it very difficult for clients to repeat the signal over and over, as they do when using a verbal command.

Another reason I use the “folded arms” visual command is because it helps clients control their behaviors. Most people automatically reach and touch a cute, jumping puppy, without thinking.

It seems we humans have an automatic urge to pet or touch puppies that jump up to greet us. This teaches puppies to jump up for greetings.

The folded arms cue is easy for anyone to perform and appears relatively the same to the dog, no matter who is giving the command. This is helpful when you start asking friends and neighbors to ask your dog to sit.

Ask 3 people to say “sit” to your dog. You will witness 3 very different techniques. Some will bark the command as if this will make it happen quicker; others will add meaningless words to the command, and some may tilt their heads forward or swing their arms.

All these additional actions may confuse the dog, because the dog is very likely to process voice tone, motions and body language as the cue.

The delivery of a visual, folded-arms cue is less likely to be clouded by voice tones and body language, since the voice is absent and the body language is the cue!

Here’s how I usually teach a dog to sit on cue via the capture method.

Do not say “sit” or speak any other words during this teaching session. The only sound you will make is the sound of your conditioned marker, the instant your dog’s bottom touches the floor.

Go to a quiet location where your dog will not be distracted.

Attach a leash and instead of holding the end, just drop it on the floor.

If the dog jumps or decides to walk away, you can step on the leash to prevent either of these behaviors.

Stand a couple of feet away from your dog.

Do not speak to your dog, just give your dog a small food treat. Do this three times. Now you have your dog’s attention!

Fold your arms across your chest and tuck your hands underneath your armpits.

Do not speak, just smile at your dog and wait until he sits.

Mark the instant his rump hits the floor by delivering your reward marker. Give him a treat by tossing in on the floor so that he must get out of the sit position to get the treat. Do not praise or talk to your dog.

As soon as your dog finishes the treat and looks at you, fold your arms across your chest, remain silent and wait. He will sit. Mark the instant his rump hits the floor. Give him a treat.

Repeat 3-5 times.

At the end of this quick session, you can talk and play with your dog. Now you can use the act of folding your arms across your chest as a silent signal for Sit!

To teach your dog the word “sit” means the same as the folded arms, visit this page.

Troubleshooting Sit for Folded Arms

Attention-on-Cue, While Standing

The goal is teach the dog to look towards you on command. Attention on Cue is helpful when you are not interacting with the dog but do wish to start interacting. It is helpful if the dog gets distracted and you want his attention.

Teach your dog to attend to you when you say “now”, “chickie”, “hey”, “look”, “hup”, “turn”, or whatever short word you choose.

I do not use the dog’s name for the attention-on-cue signal.

The signal (command or cue) for attention should be unique! The dog hears his or her name countless times and it doesn’t necessarily mean “Look towards me, I will pay you”.

In order to increase behaviors using rewards, first you must get the behavior.

The recipe is for teaching is:

  • set up the environment to get the behavior
  • mark and reinforce the behavior
  • practice in many areas while adding distractions

For this exercise, we’ll use nothing but the signal and food to initially get the behavior to occur.

Then we’ll use the marker to bring attention to (and reinforce) the behavior of looking towards us when we give the cue.

We’ll follow the marker with food treats the first few trials.

Once the dog learns what is expected of him or her, we’ll mark the instant of success and deliver FAT as a reward for looking when we give the signal.

Get the Behavior

Your dog can be on a leash or not. I like to do it off lead in a secure, small area, but if that’s not available to you, attach a 6 foot leash.

It’s okay if other people are nearby, but you don’t need distractions for this step.  If other people are present, just ask them to stand quietly.

With your dog nearby, speak your “attention signal” and immediately toss or hand your dog a treat (unless he or she is jumping up on you or performing some other rude or obnoxious behaviors). Say the signal, deliver a treat. No markers are used in this step. Repeat 2 times for a total of 3 trials. By now your dog should be focused on you. If not, discontinue the session and move to a quieter area, or choose a higher value food treat and try again.

Mark and Reinforce the Behavior

You might need a very small distraction for this step. Ask a family member to stand nearby, within sight of your dog. Instruct them to tap with their shoe, make a small noise, or whatever it takes, to momentarily attract the dog’s attention towards them.

Wait until your dog is close by, but not looking directly at you. Speak the cue and watch closely. Mark the instant he or she begins to turn his or her head towards you. Toss your dog a treat. Do this 2 more times for a total of 3 trials.

Behavior will be Repeated

Practice “attention-on-cue” at odd times throughout the day, inside the house, in any room that is relatively quiet.

Ask for the behavior 3-5 times during short time periods at different times of day, in different rooms.

Once your dog is obeying this command in rooms without distractions, add distractions by asking a family member to make some sort of noise or slight motion.

Once your dog is obeying, while inside the house with distractions, it’s time to practice outside. Choose quieter areas at first. Attach a leash and go to your patio, yard or any other familiar area.  After you can succeed in these areas, go to other places with more distractions.

Randomly ask for the behavior at odd times when you are not conducting a “training session”. Your goal is to practice this behavior in so many different areas, with so many different creative distractions, that your dog will always look when you give the command!

Happy Training!
Alan J Turner – Companion Animal Behavior Counselor and Trainer
Memphis, Collierville, Germantown Private and Group Dog Training
Fear, Aggression,Anxiety, et cetera
How to Teach Teach your Collierville TN Golden Retriever Dog or Puppy to Stay

JackGRStay

I use stay as a temporary command whenever I want Bentley to remain in one spot for a brief period.

This is useful if I drop or spill something and want to pick it up without being “mugged” or bothered by a curious dog.

When I ask Bentley to stay, I am saying, “Please remain in this location. I am going to leave or perform some task. I will come back to you and give you a reward for staying.”

When teaching stay, I never walk away and then call the dog to me. I always return to the dog and release him from the stay.

I teach stay in cycles. Each cycle I add a bit more movement or action. Once the dog learns the concept of stay, I add distractions. I might practice the same cycles with items in my hand, while waving my arms, clapping, dancing, etc.

Once the dog will stay for my distractions, I work with the dog and invite other people to play the role of distractions.

Before you begin training your dog, you’ll need to learn a bit about communication and motivation. Please visit the Dog Training Start Here Category. There you will learn about markers and rewards, two excellent topics for communicating and motivating! A prerequisite for “stay” is “Attention on Cue”. It doesn’t hurt if your dog already knows “Sit” too!


Cycle 1:

With the dog on a lead, I say “stay”, wait 1 second, and then push my open hand towards him – like a stop signal. Then I withdraw my hand.

I wait 2 seconds and then deliver the reward marker to release the dog, followed by  a food treat.

Cycle 2:

With the dog on a lead, I say “stay”, wait 1 second, and then push my open hand towards him – like a stop signal. Then I withdraw my hand.

I take a couple of steps with each foot, but do not move forward or backward. I march in place. I stop moving my feet.

I wait 2 seconds and then deliver the reward marker to release the dog, followed by  a food treat.

Cycle 3:

Same as cycle 2 except I might take a backward step and then return, or twist my upper body or shoulders just a bit.

I stop all body motions.

I wait 2 seconds and then deliver the reward marker to release the dog, followed by  a food treat.

Following Cycles:

Each cycle I get a bit more creative with my actions or movements. I always return to the dog, pause 2 seconds and then release him by delivering the marker.

Troubleshooting Stay

Many people tell their dogs to stay and immediately turn and walk away.  Naturally the dog follows. He has no clue what stay means. When this happens, people just repeat the sequence but say “Stay” a bit harsher, as if now the dog will understand.

The key to success is teaching in cycles. Add one small bit of motion during each cycle. If your dog does not stay, reduce the motion and try again.

It helps to have a particular goal in mind. For instance, teach your dog to stay when you drop a pencil and then pick it up. Each cycle will add a bit more of the motion involved in bending over and picking up an item.

Be patient, add small “pieces” of distractions and you will succeed!

If your dog follows you, herd him back to the beginning location, repeat the command and try again. This time use less motion. If your dog fails 2x in a row, make sure you succeed on the 3rd cycle. Perform an easy cycle with no distractions.

I never let my dog fail 3x in a row. THree failures in a row tell me that I am adding distractions above his current skill level.


Print This Post Print This Post


Happy Training!
Alan J Turner – How’s Bentley – Memphis TN
Private and Group Dog Obedience Training – Collierville TN

How to Teach your Dog or Puppy to Lie Down


KojackThere are many methods to teach down. Before you begin training your dog, you’ll need to learn a bit about communication and motivation. Please visit the Dog Training Start Here Category. There you will learn about markers and rewards, two excellent topics for communicating and motivating! A prerequisite for “stay” is “Attention on Cue”. It doesn’t hurt if your dog already knows “Sit” too!

Here’s how I use and fade a food lure when teaching down via the lure method. It’s much easier to lure a down from the sit position, so the pup must know sit.

Introduce this (and any new behavior) in a quiet area where you are not competing for your pup’s attention.

Place a few small treats in a dish nearby. Stand in front of your pup. Ask him to sit. Acknowledge the sit with a “thank you” or a smile.

Place a small piece of food in the palm of your open hand. Hold it in place by crossing your thumb over it. Keep your fingers straight. Now, hold your hand with the treat next to your shoulder, palm out – as if you were taking an oath. Say nothing.

Hold your hand in position for about 3 seconds and then place your open palm (with treat) directly in front of your pup’s nose. Say nothing. Slowly move your open hand straight down, being careful not to lose the “connection” between the dog’s nose and the treat. (Your hand should never be more than 2 inches away from your dog’s nose during this step.)

Depending on the dog’s size and your height, you may need to kneel down before you place your hand in front of the dog’s nose.

The dog should move his head down in an effort to follow the treat. Keep moving your hand down, until it is almost to the floor. Right before your hand reaches the floor, move your hand just a wee bit closer to you. This will give the dog space to move his body into the down position without standing up.

When the dog plops his chest down on the floor, mark the instant of success and then release the treat.

Repeat two more times (with a treat in your hand each time) for a total of three trials.

On the fourth trial, do not place a food treat in your hand. Repeat the same sequence of steps. Slowly move your empty hand downward to lure the dog into the down position. Mark the instant of success and then get a treat from the dish. Toss the treat on the floor.

This will keep the dog’s attention focused downward and get him into a standing position, ready for the next trial. Repeat the sequence two more times without a treat in your hand.

Troubleshooting – Lure Down

When luring your dog into the down position, he might stand up. If your dog stands up, it is likely that your hand is too far away or you are not moving it straight down. Your hand should track the natural path that the dog’s head tracks when he lays from the sit position.

Here’s what I do if the dog continues to move out of the sit position, even though I am following the correct path with my hand. I remove my hand the instant the dog moves out of the sit position, and start over from the beginning.

Once your dog will follow your empty hand, it’s time to fade your hand motion.

Start the next exercise immediately after three success followed by a very short play period.

Lure Down – Fading the Hand Motion

Now that your dog has followed your empty hand a few times, you can fade your hand motion and teach the dog that your initial ‘hand-beside-shoulder signal’ is the cue to down. Here’s how I do it.

To warm the dog up, repeat the same sequence as before, without a treat in your hand. Hold your open palm up next to your shoulder as if you were taking an oath. Wait about 3 seconds and then place your hand directly in front of your dog’s nose. Slowly move your open hand straight down, being careful not to lose the “connection” between the dog’s nose and your hand. Your hand should never be more than 2 inches away from your dog’s nose during this step.

The dog will move his head down in an effort to follow your hand. Keep moving your hand down, until it is almost to the floor. Right before your hand reaches the floor, move your hand just a wee bit closer to you. This will give the dog space to move his body into the down position without standing up. When the dog plops his chest down on the floor, mark the instant of success and then get a treat from the dish and pay your dog. Do this two more times for a total of three trials.

On the fourth trial, follow the same sequence- except – instead of 3 seconds; hold your open palm at shoulder level for several seconds and just smile at your dog. Wait quietly. If your dog is looking at you, wait up to 15 seconds. Say nothing. Just smile. Be prepared to mark the instant of success as many dogs will go down within the 15 seconds.

If your dog doesn’t go down within 15 seconds, complete the sequence as before. Try again two more times with the 15 second wait time. Most dogs will “get it” within these three trials.

Troubleshooting – Hand Signal for Down

If your dog averts his attention during the 15 second period, make some soft noise that will reengage his attention right before he starts to fidget. Don’t use words. I usually make kissing or clucking sounds. Be patient.

If your dog doesn’t go down within the 15 second period, follow the same sequence as before. Slowly move your open hand straight down, being careful not to lose the “connection” between the dog’s nose and your hand. The dog should move his head down in an effort to follow your hand.

Keep moving your hand down but stop moving your hand 2 or 3 inches before you get to the floor. Your dog should keep going down. Mark the instant of success and then give your dog a treat from the dish.

Methodically decrease the amount of downward hand motion from trial to trial.

After several trials (or maybe several short sessions with several trials) your dog will go down earlier and earlier during the sequence. Now, the open palm in oath position is your hand signal for down!

Happy Training!
Alan J Turner – How’s Bentley – Memphis Tn
Private and group dog obedience training and behavior
Germantown, Collierville,Memphis,Arlington,Bartlett,Cordova,Olive Branch,Oxford,TN,MS

How to Teach your Dog or Puppy to Go To Place

bentley2

Go to Place is one of my favorite behaviors. I use it to keep Bentley, my AKC registered, Australian Terrier. from licking the dishes while I load the dishwasher, irritating my guests, pestering me during dinner, or any other times I want him to relax in one spot.

Before you begin training your dog, you’ll need to learn a bit about communication and motivation. Please visit the Dog Training Start Here Category. There you will learn about markers and rewards, two excellent topics for communicating and motivating! A prerequisite for “stay” is “Attention on Cue”. It doesn’t hurt if your dog already knows “Sit” too!

You can have more than one “place” for your dog. Bentley has 2 places in my 14X14 den! I have a crate pad placed on top of a ottoman, and he has a comfortable dog bed on the floor. I like to use a dog bed because it’s portable. I can place it in my car, on my back patio, in a hotel room or wherever my dog is welcome.

Here’s a good crate pad type of bed made of synthetic sheepskin. I like these because they are easy to wash and have a raised edge for the dog’s head. Hey, those guys like a pillow too!

Purchase an inexpensive bed, like this one, if your guy or girl is still a puppy.

The more expensive beds are for dogs that don’t treat the bed as a toy.

Before I teach any behavior, I always like to outline the steps necessary for success.

What are the individual behaviors that make up go-to-place? The dog must go to the place, then lie down and then stay. You could break it down into many smaller pieces.

For example, before the dog can go to the bed, he must first look towards it. Before he can lie on the bed when asked, he must know the command “down”. And, before he can stay on the bed for say, 15 minutes, he must be able to stay for 15 seconds.

There are many ways to teach go-to-place. Some require more thought than others. I have written a short description of how to teach your dog to go to place AND how to use Classical or Pavlovian Conditioning to condition your dog to like his or her place!


Go-To-Place

There are many ways to teach go-to-place. Some require more thought than others. I’ve found that luring is the easiest for most of my clients.

Feed the Birds

Before we start, I say, “Think about feeding pigeons in the park”. First you toss bird seed. Before long, pigeons find the food, land on that spot and start feeding. Then you toss more seed as they are feeding. Do this every day at noon.

After a few days, the sight of you approaching will attract the pigeons. They are already in place waiting for the food! Do the same with your dog and your dog’s bed.

Get your dog’s dinner out and instead of placing the bowl on the floor, place it next to you on the dinner table, coffee table or kitchen counter.  Place the dog bed in a spot a few feet away.  Toss a few pieces of dog food on the bed.

Do not speak to your dog during these steps.

While your dog is eating, toss a few more pieces to keep him busy looking for food.  As soon as he finishes and starts to walk off the bed, toss more food on the bed.

After he eats all the food on the bed, your dog will come towards you. Before he reaches you, toss a few more pieces over his head and onto the bed. Say nothing.

Repeat this sequence a few times. Wait until he starts to walk towards you and toss a few pieces over his head, onto the bed.

Soon your dog will be on the bed waiting for the food to rain down around him!

Add the Cue

After your dog catches on, speak your “go-to-place” cue when your dog is walking towards you and before you toss any food. Some of the commands I like are “Your Spot” and “Cozy Mat”.

You may need to help your dog by walking towards the bed and pointing to it or touching it with your hand.

When your dog gets all four feet on the bed, mark the instant (with your reward marker) and then toss a food treat. Walk a few feet away. If your dog follows, give the cue and move towards the bed. Mark the instant he gets on the bed and then toss a few pieces of food.

Once he is going-to- place on cue, ask him to “down”. Toss a few pieces of food after he goes down. Over several trials, increase the periods of time in-between tosses of food.

Condition Go-To-Place

Chewing helps dogs relax. At this stage you can add a special chew treat into the routine. After your dog is on his bed, give him a long lasting, high value, unique, chew treat.

Here’s the best treat for conditioning GO-To-Place. This free range chew will not stink up your house, nor will it stain your carpet, like the ones you find at local pet supply stores. CAUTION, This chew has the potential to turn Fluffy into Cujo! Read about Food related aggression by clicking anywhere in this sentence.

By pairing a special chew treat with the bed, you are taking advantage of classical or Pavlovian conditioning. The bed will elicit the same physiological calming response as chewing.

If he gets up from the bed, say nothing, just take the special treat away.

The sequencing is important. The dog must be on the bed before receiving the unique chew treat. The instant he gets off the bed, remove the treat.

By following this sequence, you are teaching your dog that lying on the bed predicts the delivery of the chew treat, and leaving the bed predicts the loss of the chew treat.

At first, you’ll always give your dog the unique treat once he is on his bed. After several sessions, you won’t always give the special chew treat. Sometimes you will, other times you won’t.

The act of lying on the bed will elicit the same calming effect as the chew treat, even when he does not have the treat.

A common mistake is to give the dog the special chew treat when he is not on the bed.

In order to maintain the association, the unique chew treat should only be delivered when the dog is on the bed.


Happy Training

Alan J Turner

Companion Animal Behavior Counselor & Trainer

Private and Group dog training services in Memphis TN

http://howsbentley.com


How to Teach your Dog to Drop or Give

Australia Terrier Bentley
Australian Terrier Bentley

Description:

The dog releases an item from his or her mouth.

Function:

Final step in “Fetch”, or anytime you want the dog to release an item from his or her mouth. When teaching fetch, teach give or drop first, and the other steps like carrying the ball and finding the ball will naturally fall into place.

Before you begin training your dog, you’ll need to learn a bit about communication and motivation. Please visit the Dog Training Start Here Category. There you will learn about markers and rewards, two excellent topics for communicating and motivating! A prerequisite for “stay” is “Attention on Cue”. It doesn’t hurt if your dog already knows “Sit” too!

Considerations / Prerequisites:

Where do you want to dog to place the item? –  on the floor, on the table, in your lap, in your hand, in a basket, in another’s hand, in another room?  Do you want to dog to sit or lie down before the drop?

Some dogs quit “holding” items after 2 or 3 trials. You may need to teach “Hold”, “Sit”, “Place”, Down”, “Leave-It”, or, try again later.

The balance between the value of the item and the value of the treat is important.  If your dog is not dropping the item before you open your fist by trial 5, reconsider your item and treat choices. Begin practicing with a tennis ball or other fetch toy and use high value treats. When your dog “catches on”, use other items that do not belong to the dog and lesser value treats!

Your task is to mark (or click) the instant the dog releases the item. When following the instructions, be ready to click regardless of where in the sequence the dog releases the item. Many dogs will release before you finish the sequence of steps.

These instructions are a sort of guide. You can adapt the instructions to fit you and your dog. You may not need all the steps. The goal of this post is to teach a concept. The general concept is:

  1. Get the Behavior to Occur
  2. Mark the Instant it Occurs
  3. Deliver some sort of reward


Visual Cue: Handler holds his or her fist directly in front of dog’s nose. 

Audible Cue: Handler speaks, “Drop” or “Give”.

Teach Drop

Trial 1:

  • Say “Drop”, pause 1 second.
  • Present fist with treat (visual cue), pause 1 second.
  • Push your fist forward (palm down) until your fist is directly in front of the dog’s nose, pause 1 second.
  • Rotate your fist until it is palm up, pause 1 second.
  • Open fist to reveal treat. Mark the instant the dog releases the item. Give treat.
  • Pick up item and give it back to the dog.

Trial 2:

  • Say “Drop”, pause 2 seconds.
  • Present fist with treat (visual cue), pause 2 seconds.
  • Push your fist forward (palm down) until your fist is directly in front of the dog’s nose, pause 2 seconds.
  • Rotate your fist until it is palm up, pause 2 seconds.
  • Open fist to reveal treat. Mark the instant the dog releases the item. Give treat.
  • Pick up item and give it back to the dog.

Trial 3:

  • Say “Drop”, pause 3 seconds.
  • Present fist with treat (visual cue), pause 3 seconds.
  • Push your fist forward (palm down) until your fist is directly in front of the dog’s nose, pause 3 seconds.
  • Rotate your fist until it is palm up, pause 3 seconds.
  • Open fist to reveal treat. Mark the instant the dog releases the item. Give treat.
  • Pick up item and give it back to the dog.

Trial 4 -xx:

Follow the same sequence, but omit the treat in your fist on trials 4 and above.  Add 1 second to the sequence of pauses.  Most dogs learn this very quickly, and will drop when you say “drop” within 2-3 trials. That’s okay if your dog doesn’t, just add 1 second every new trial. For example, if you make it to Trial 7, you will have 7 second pauses in the trial.

Once your dog learns to Drop or Give on command, practice with items and toys of all shapes and sizes. You can discontinue the marker and food treat reward. The reward is you throwing the ball again!
Happy Training
Alan J Turner – How’s Bentley Memphis
Private Dog Trainer, Group Dog Obedience in Collierville and Downtown Memphis

FREE – Dog Won’t Come? Teach Your Dog to Come Bump Your Target

criscojailPlease read Start Here AA-1 through AA-5 before you teach your dog to target.

Crisco, the turbo Jack Russell Terrier in the picture, will almost always come when called. Crisco has been very well trained by her owner via the use of targets!

Here are some thoughts about targets introduced to me by Kayce Cover, B.S., M.A.

Targets give the dog critical information about where success will take place. Examples of targets are a simple wooden dowel with a piece of tape on one end for contrast, your hand, extended fingers, or other items such as a business card, ink pen, plastic lid from small food container, piece of tape on the wall, dot of light from a laser pointer, etc.. You can purchase a target stick from pet supply stores.

Many trainers use targets to teach service dogs how to operate light switches, press doorbells, open doors, pick up items, et cetera. The dog is taught to go to the target, bump the target with his nose (or any other body part) maintain contact with the target, sit / lay on the target, pick up the item touching the target, or any number of behaviors, depending on the type of target and the application.

The use of target(s) is an excellent method to teach motion behaviors or to teach the dog where a behavior should occur.

Simple applications for target sticks are teaching a dog to spin and to heel.

Target Touch

Here’s how to teach your dog to bump a two finger target. To form a two-finger target, extend your index and middle fingers and tuck your ring finger and little finger into your palm with your thumb.

You will present the two-finger target on a plane, horizontal to the floor, as if you are pointing to someone next to you. The dog will touch the outside or knuckle side of the target.

Say “Touch” and immediately position the end of the target one inch from your dog’s nose. He will sniff it.  Do not move your target to touch his nose. He should come to you!

Mark the instant (with your conditioned marker) he touches your two finger target with his nose and immediately withdraw your target. Deliver a reward. Repeat three times, but place the target a bit farther away and to the left or right of your dog’s nose on trials 2 and 3. Now you can use the two-finger, nose target, to guide your dog into position.

Target Here – Foster a Partnership

The “touch” exercise is much more than a simple command. It is a very clear method to tell your dog what you’d like him to do and exactly where success will take place. It is a powerful tool for building an attitude of cooperation, a partnership.

The target provides a visual focal point, a precise point in space, where a behavior is to take place.

Using a target is one method to recall your dog. To use it for a come command, do this. Instead of saying “touch”, say “here” and then present your two finger target a few inches from your dog’s nose. Practice “here” at various distances in very short sessions. I usually practice this command 3-5 times during a short practice session.

I view “here” as a tool for nurturing a senior – junior partnership with Bentley. When I ask him to target, I’m really holding a two way conversation about cooperation.

I’m asking Bentley – “Hey Bent, I’d like you to come over here and bump my target with your nose. Do you understand what I want you to do? Do you understand where success will take place? Do you understand that I will pay you for your cooperation? Are you willing to cooperate? “

Bentley races over to bump my target. He’s replying, “Hey Alan, I know what you want me to do. I know where success will take place. I know you’re going to pay me. I’m willing to cooperate.”

Troubleshooting Target Here

Teaching your dog to touch your two finger target can be frustrating! Sometimes the dog will bite your fingers, or just quit targeting altogether.

If your dog is biting your target, check for these common errors. Review your timing and target placement. You should mark the instant he touches the target, not one second afterwards. Are you withdrawing your target immediately after you mark the instant he touches it? If you leave your target in place after the marker, your dog may mouth or bite the target. It’s best to remove your target immediately after you mark the touch.

If your dog sometimes ignores the target, review the placement of the target. Position the target nose height or lower.   The target should be horizontal to the floor (as if you are pointing to something next to you).

What are your actions after he bumps the target? Are you moving the target towards the dog (thus bumping him right before he reaches the target)? Do you end his fun or mark the instant and give a reward?

Some dogs lose interest if you repeat the exercise more than 2-3 times during a short session.

Print This Post Print This Post

Happy Training!

Alan J Turner – Companion Animal Behavior Counselor & Trainer, Canine Specialization
Private and Group Dog Obedience Training
Member: APDT

How to Teach your Dog to Come when you Blow a Whistle

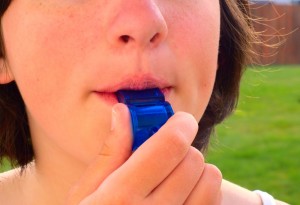
bigstockphoto_girl_blowing_blue_whistle_38094411Whistle Come

There are many different methods to teach dogs to come when called. Here is an easy way to teach your dog to come when you blow a whistle. You may be creative with your whistle signal. For example, you could blow a short toot followed by a long toot.

Access this and other training articles quickly and easily on my new iphone / ipad / android FREE app

Get a whistle.  Any type of whistle will do. Sporting goods stores stock a selection of whistles. Walmart and Target have some in their sporting goods sections.

Use special treats for this exercise, not the normal treats you use for training. Small pieces of chicken, ham, cheese or turkey work well. The idea is to choose a treat that your dog will LOVE! Choose a unique and delicious treat that your dog never ever gets any other times!

From this point forward, you will only blow the whistle during whistle come exercises.

IMPORTANT:Do not use the whistle to call your dog when he or she is misbehaving!  It will increase the misbehaviors! THEREFORE , if your dog is digging or barking or misbehaving, first get your dog’s attention, then blow the whistle when he or she is looking at you.

Do not speak to your dog, or touch your dog during Steps 1 and 2.

Step 1) Go to your den or family room and have your dog next to you. Blow your whistle and hand your dog a treat. Wait a couple of seconds, blow your whistle and give your dog a treat. Repeat 4-6 times. You are finished now. Put the whistle away.

Wait 3-5 minutes and repeat the sequence in another room of your house. Do this in 3 or more different rooms during 3 or more different sessions.

Step 2) Go to an outside area and have your dog on a short leash next to you. Blow your whistle and hand your dog a treat. Wait a couple of seconds, blow your whistle and give your dog a treat. Repeat 4-6 times. You are finished now. Put the whistle away.

Wait 3-5 minutes and repeat the sequence in another area outside. Do this in 3 or more different outside areas during 3 or more different sessions.

Step 3) Practice in the front yard or other unfenced areas with your dog on a 10-25 foot line. Practice in 3 or more different outside areas during 3 or more different sessions. When your dog comes, hand him or her a treat. Praise your dog! Toss a ball! Play with your dog!

Step 4) Go to a fenced area outside with your dog off leash. Let your dog wander around for 5 minutes. Blow your whistle and wait. When your dog comes, hand him or her a treat. Praise your dog! Toss a ball! Play with your dog!

After several sessions, vary the rewards.  Use treats sometimes, or use praise and play as rewards. Soon, your dog will always come when you whistle!

Access this and other training articles quickly and easily on my new iphone / ipad / android FREE app. Get the app here: https://alanturner.cardtapp.com/

IMPORTANT:Do not use the whistle to call your dog when he or she is misbehaving! It will increase the misbehaviors! THEREFORE , if your dog is digging or barking or misbehaving, first get your dog’s attention, then blow the whistle when he or she is looking at you.
Print This Post Print This Post

Happy Training!


AT

Alan J Turner, Companion Animal Behavior Counselor & Trainer – Canine Specialization

Private and Group Dog Training in Memphis,

Owner: How’s Bentley – 


Jump Start – Puppy & Dog Obedience Training Booklet – $4.95

bentpup5
Bentley, 9 week Australian Terrier, September 1999

Picture is Bentley, my Australian Terrier at 9 weeks.

For puppies and dogs of all ages!

Teach your puppy or dog very quickly using kind methods! Everyone who wants to use rewards based training methods to teach their new puppy or older dog will benefit from owning this 46 page booklet! How’s Bentley Jump Start is a “must have” for positive reinforcement trainers.

Most of the information in this PDF e booklet is on this site for FREE.

This PDF e booklet is for those who want an indexed copy of some of the instructions on this site.

Written by Alan J Turner,

Basic Obedience and Manners – 46 pages including cover and table of contents.

Steps to Success – How to Communicate – Establish a Reward System – Condition a Reward Marker – Cues – Capture Sit – Door Knock Game – Teach Target Here – Lure Down -Teach Attention (with command and without command) – Target Touch – Go to Place – Stay – Inside/Outside, and More!

You may purchase PDF ebooklet on the “Products” page.

Happy Training!

AT

Alan J Turner, Companion Animal Behavior Counselor & Trainer – Canine Specialization

Private and Group Dog Training in Memphis, TN

Owner: How’s Bentley