House Training Quick Start Guide

bucketwestie1

  • Manage the environment. Close doors, use crates, baby gates, tethers, et cetera.
  • Get a clean bill of health from a veterinarian.
  • The dog should be leashed, confined or supervised at all times while inside.
  • Anytime you cannot directly supervise your dog, use a crate or confinement area to keep your dog and your house safe.
  • If you will be gone for periods longer than the dog can wait, place newspaper (or house training pads) on the flooring of the area where your dog will be confined.
  • Introduce your dog to the concepts of confinement and alone time.
  • When you are inside and your dog is not confined, use a tether.
  • To use a tether, make a 6-9 foot lead you can attach to furniture or your waist.
  • Always provide your dog with adequate access to the “potty” area.
  • Feed your dog at the same times each day
  • Unless directed otherwise by a veterinarian, take up bowl and uneaten food after 15-20 minutes.
  • Keep a log of feeding and elimination until you learn your dog’s schedule.
  • Always attach a leash, go out with the dog, and lead him or her to the elimination area.
  • Wait patiently for 5-9 minutes. If the dog doesn’t eliminate, return inside, crate or confine the dog for 20 minutes and then try again.
  • Teach your dog cues for defecating and urinating on command.
  • Teach your dog that rewards are for eliminating outside.
  • Reward your dog for eliminating outside.
  • Teach your dog to ring a bell to signal desire to go outside.
  • Never scold or punish your dog for any “accidents”.
  • Clean soiled, inside areas, with cleaners containing pet odor neutralizers.
  • When your dog becomes more reliable, gradually grant supervised access to more areas of the house.

Alan J Turner, Companion Animal Behavior Counselor & Trainer – Canine Specialization

Private and Group Dog Training in Memphis, TN

Owner: How’s Bentley

What Size and Type of Crate Should I Choose for My Puppy?

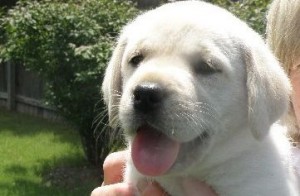
White lab puppy

Crate Selection

There are several styles of crates on the market. Some are large metal cages and others are tents or plastic carriers.

Tents and crates made of fabric can easily be destroyed by an active puppy.

Some dogs have a difficult time relaxing in the metal cages because they are constantly monitoring the environment outside the cage.

Since they can see in all directions, every movement or noise places them on alert. I’ve met several dogs that learn to constantly spin in these large wire crates.

I prefer the plastic, airline type carriers. These are more like a cave than a cage. They are portable, can be easily moved, and can be used in vehicles and on trips. In addition, the protection of closed sides offers a more secure environment for a resting dog. The dog only has one direction to monitor.

Amazon sells crates of all sizes at great prices. Here’s my favorite. Select the size that fits your puppy!

If you already have a cage, place a blanket over the top and sides or place it in a corner so your dog isn’t shouldered with the task of monitoring all directions.

People often buy the largest crate that will fit into their space. This is not necessarily the best choice, unless you will be leaving your dog for extended periods or you install a divider.

Pups with large crates may use the crate for a bathroom, when in fact they would not eliminate if restricted to a smaller area.


Crate Size and Setup

People often buy the largest crate that will fit into their space. This is not necessarily the best choice, unless you will be leaving your dog for extended periods or you install a divider.

Pups with large crates may use the crate for a bathroom, when in fact they would not eliminate if restricted to a smaller area.

Large crates with a divider are an economical choice for large breed pups.

The adjustable divider allows you to modify the size of the crate as your pup grows!

Home with Pup

If you are home during the day and can provide your pup with regular access to the outside, choose a crate that is just large enough for the dog to stand up without restriction, to turn around, and to lay with legs extended.

If you never leave your pup in the crate too long and you have already chosen a larger crate, place a barrier inside to reduce the area.

Natural tendencies for cleanliness developed as a very young pup should prevent your puppy from soiling the small area unless you wait too long between trips outside.

For extra protection, line the entire crate with newspaper.

Pup Home Alone

It would be nice if we could stay home and play with our puppies every day, but that’s not realistic, is it?

If you are like me, you may not be able to arrange for a neighbor or pet sitter to come over and exercise your puppy.

Install a Bathroom and Newspaper Training

If your pup will be left in the crate for longer periods, select a larger crate. Set up a bathroom in the crate.

Place your dog’s water and bedding in the front of the crate and cover the floor of the entire crate with newspaper or training pads.

An alternate setup for people that will be gone for extended periods is to use an exercise pen and a ‘just large enough’ crate with the door removed.

Place the crate with bedding inside the exercise pen. Place pads or newspapers inside the crate. Place pads or newspapers on the floor around the crate, making sure to cover the entire room or area.

Something should be covering the surface or your dog will associate the floor with an appropriate area to eliminate.

Expect your pup to shred the newspaper. It is not necessarily a problem unless he ingests it. If your puppy shreds the newspaper as soon as he is confined, examine his exercise schedule. See if you can squeeze in a bit more exercise. Tired pups don’t usually spend hours shredding newspaper.

After three weeks have passed and your pup has not eliminated inside his crate, remove the newspaper/pads from the inside of the crate.

Wait another week and then move the newspaper/pads one or two inches away from the crate each day.

Position the paper towards the door or closer to the permanent destination. If your pup eliminates off the paper, you moved it too far, too soon. If this happens more than once, start over and cover the entire floor.

Place some of the used newspaper outside where you take your dog to eliminate. The odors will prompt your dog to use it again.

Anytime you notice pre-elimination behaviors such as sniffing, circling or squatting, say “let’s go potty” and take the pup outside to the desired location.

Happy Training!

Alan J Turner – Companion Animal Behavior Counselor and Trainer, Canine Specialization

How’s Bentley – Memphis, Collierville, Germantown TN

21st Century Canine Relationship Solutions

Group Dog Obedience Classes

Private Dog Training in Memphis TN

Reactive Dog Specialist

Doggie Poop, Pee on Command!

Duchess_IskiswitzWhen it’s cold outside, when traveling, or anytime you are about to leave the house, it’s wonderful when your dog will eliminate or potty on command.

It’s easy to teach your dog two different commands or cues, one for urination and one for defecation.

It helps if you are already familiar with your pup’s potty signature. Observe your pup closely so you’ll recognize when he is about to eliminate and you will recognize if he is going to urinate or defecate.

Choose three words or phrases– one for the act of moving to the bathroom area, another for urination, and a third command  for defecation.

I use “let’s go potty”, “pee“, and ”poop”. Choose phrases or words that suit you and your family.

Label Each Behavior

First, teach your dog the phrase for moving towards the bathroom area.  Before you go out the door with your pup, say “Let’s go potty”. When you are leading your dog to your preferred area, again say, “Let’s go potty”. This works best if you refrain from adding other comments. Just speak the three words, “let’s go potty”.

Many people repeat phrases over and over as they are walking around with their pup. It’s not helpful to repeat your commands over and over, two times is enough.

Watch your pup closely for signs of pre-elimination. When he is committed to the act, tell him what he’s doing.

For example, suppose your pup is sniffing, circling and is about to squat and urinate. Softly say “Piddle”. After he urinates, say “that’s piddle”, and immediately deliver the after-elimination rewards (treat and praise).  Play a quick game of ball or act silly and let your pup chase you.

Repeat the sequence for defecation; just replace “piddle” with your word for defecation.

Label the behaviors for the next day or so.

I’ve found that 4-6 instances of labeling are enough to teach most dog the names of the acts.

Teach your pup that good things happen immediately after he eliminates outside. Praise him; give him a special treat and initiate a game of fetch or chase – immediately after he eliminates. For now, deliver all food treats outside, at the elimination area, right after you praise your pup for eliminating outside.

After potty area conditioning occurs, delivering treats (as well as the timing of the delivery) won’t be important. You can give your dog a treat outside, after he comes inside – or not.

Cue the Behaviors

After a day or so of labeling each of the behaviors, you can transform the labels into commands or cues.

Perform these steps when you know your dog needs to eliminate. The first trip of the day is usually a good time.

Before you open the door, say “Let’s go potty”.  Lead your dog out to the area. Say “Piddle” and wait. Do not repeat the command. After your dog urinates, throw a party! Play a game. Toss your dog a treat. The idea is to teach your dog that fun stuff happens after elimination!

If your dog doesn’t urinate when you give the cue, don’t repeat the command. His hearing is better than yours!  He heard it; he just hasn’t caught on yet. Repeating the cue is not helpful. Just back up in this program and repeat the labeling sequences.

Once your dog learns the labels, he will eliminate on cue.

Most dogs always have a bit of urine in their bladders, so urinating on cue usually happens right away. Teaching your dog the cue for defecation requires a bit more planning. You’ll want to deliver that cue only when it’s time for your dog to have a bowel movement! Refer to your log and only deliver the cue for defecation when your dog is due a bowel movement.

Happy Training!
Alan J Turner – How’s Bentley Memphis

Teach Your Dog to Ring a Bell – for Potty Signal

RingBellMost people state they want their dogs to bark to signal the nedd to go outside to potty. I suggest teaching the dog to ring a bell instead of teaching the dog to bark. The dog will inevitably signal when she doesn’t need to use the bathroom but she does want you to interact. If you teach her to bark at you, she will learn to bark at you for attention.

If you teach her to ring a bell, you can always take the bell off the doorknob. In addition, you can take the bell to a hotel room, a friend’s house, the basement, or anywhere you want.

I suggest placing a bell on a string and hanging the string on the doorknob, but you can always hang the bell on your easy chair, kitchen island, bed post, or anywhere you like. Hobby and craft supply stores carry the ball-like bells in several sizes. String two or three on a leather string for a full sound!

Some people use a wireless doorbell and teach the dog to push the button with her paw or nose. This allows them to place the ringer near to them, when the door and the dog may be rooms away. This requires a bit more training to teach the dog to bump the button hard enough to ring the wireless bell.

Method two is best if you want to use a wireless doorbell.

It doesn’t matter where you place the bell or if you use a wireless doorbell. The concepts for teaching are the same. Just adapt these instructions for your situation. There are several ways to teach your dog to bump a bell to signal a desire to go out. I’ll list two of them here.

Method One is simple to follow but may take some dogs longer to learn.

Method Two takes more time and thought and effort, but works with all dogs and is best if you want to use a wireless doorbell. You decide which Method is best for you!

Method One

Hang a bell on the door that Caroline exits to go potty. Leave the bell on the door from this point forward. Before you ever touch the doorknob, reach down and bump the bell with your hand.

Always bump the bell with your hand, and then open the door. Do this for several days.

If she sniffs or noses the bell, make a fuss as you praise her and then open the door. If you want, you can speed up the process by placing a teeny tiny bit of peanut butter on the bell. When she sniffs or licks it, praise her, open the door and walk her to the elimination area. Give the command to potty. After she eliminates, give her a treat, play with her, toss a ball, take a walk, et cetera.

Once she learns that interacting with the

bell makes you open the door, you can teach her to bump it with her nose. Just ignore her when she sniffs or licks and she will “sniff harder”. Wait until she bumps the bell just a bit harder.

There are many variations for Method One.

Some people gently take the dog’s paw and strike the bell before they go out.

If your dog knows how to shake, you can cup the bell in your hand to get your dog accustomed to pawing the bell. Experiment with variations and see which works best for your pup!

Method Two

This is the method you can use to teach your dog to bump a doorbell button or a bell hanging from the door. Just adapt the instructions to your situation.

Some dogs and some trainers might skip a step or perform additional steps. Use this outline as a guide to develop your own program.

After step 1, perform each step in very short sessions over the next few days.

Do not move on to the next step until you are sure that Caroline knows the current step.

If Caroline seems confused, go back to the last step that she understands and work from that point forward.

Teach Caroline:

1. a signal that will communicate success and motivate her

2. to bump the bell

3. to bump the bell when it is

hanging on the door

4. to bump the bell and then step

outside

5. to bump the bell, step outside

and walk to the elimination area

6. to bump the bell, step outside,

walk to the elimination area and

eliminate

Before you can teach any animal, you must be able to communicate what you want and you must be able to motivate the animal to want the same thing.

At the very least, you should be able to tell the animal the instant he or she has succeeded. Some people use a clicker to communicate the instant of success, but you don’t need a clicker to communicate.

You can pair any unique word or sound with treats and create your own unique signal. It is best if the word is not a common word; it should stand out as a unique signal. Initially, you’ll pair the signal or marker with food treats so the dog will be motivated to perform behaviors that cause you to deliver the signal. I use the word “kick” for the signal.

Step 1

Teach Caroline a signal that will communicate success and motivate her.

Say “kick”, and say it quick, like a sound instead of the actual word. Immediately toss Caroline a soft and tasty, bite-sized treat. Repeat ‘kick and treat’, 3-8 times. By now the sound should be conditioned and you should have her attention.

To test the signal, wait until Caroline is not looking at you but is close by. Say “kick” one time. She should turn her head towards you really fast. If not, just stop the exercise and start from the beginning at another time.

Say nothing else during this exercise.

The “kick sound” must precede the treat, so be sure and wait a second before you toss the treat. Once you have conditioned “kick”, you have a great tool to tell Caroline the instant she creates wanted behaviors.

You’ll mark the instant of success with the word “kick” and follow the ‘kick’ with good stuff, like a treat, toss of a ball, verbal praise or a quick pat.

Once kick is conditioned, you don’t need to repeat this step and you don’t need to deliver the treat immediately after the kick (marker). You can deliver the treat or good stuff several seconds after the marker.

Step 2

Teach Caroline to touch a bell hanging on a string in your hand.

Hold the string so the bell is at Caroline’s nose height, an inch away from her nose. Say nothing. Wait until Caroline sniffs the bell with her nose.

The instant her nose touches the bell, say kick and then immediately deliver a food

treat.

Perform this step several times, but hold the bell just a bit farther and farther away from her nose each time. Say kick the instant she touches it and then give her a food treat. Practice 5-8 times and then place the bell in a drawer or out of sight.

Hold a few sessions just like the first one until Caroline becomes excited when she sees you get the bell out of the drawer. Go to step 3 after Caroline will readily bump the bell whenever she has the opportunity.

Step 3

Teach Caroline to touch the bell when it’s hanging on the doorknob.

Hang the string on the doorknob so that the bell is at Caroline’s nose height. Sit or stand next to the bell. When she touches the bell on a string attached to your doorknob, say kick and then immediately deliver a tasty treat. Repeat 5-8 times per session. After each session, place the bell in a drawer or out of sight.

Step 4

Teach Caroline that the treat after the “kick” is delivered right outside the door.

When she touches the bell on a string attached to your doorknob, say kick, open the door; walk outside and then deliver the treat right outside the door. Repeat 5-8 times per session.

After each session, place the bell in a drawer or out of sight.

Step 5

Teach Caroline that the treat after the “kick” is delivered after she walks to the elimination area.

Same as step 4 but walk to the elimination area (she will probably follow you) and deliver the treat there. Repeat 5-8 times per session. After each session, place the bell in a drawer or out of sight.

Step 6

Teach Caroline that the treat after the “kick” is delivered outside at the elimination area after she eliminates.

Introduce this step when you know she needs to eliminate, such as her first outing in the morning.

Same as Step 6 but once you arrive at the elimination area, give her your command for potty and then give her a treat after she eliminates. Practice this step the next few mornings – and any other times throughout the day that you know Caroline needs to eliminate.

After a few days of practicing step 6, you can drop the word “kick” and the food treat from the sequence. Instead of a food treat, praise her, play fetch, or take her on a walk. Now, you can leave the bell on the doorknob.

When she rings the bell, say something like, “Ok, you need to potty?” and walk her outside to the elimination area. Give her the cue to eliminate.

After she eliminates, deliver something good. Toss a ball or take her for a walk in the neighborhood.

At his point, it’s important to always open the door and go out to the elimination area every time she bumps the bell. If she eliminates, then give her a treat. If she doesn’t eliminate after you’ve given the command, just go back inside. You can leave her out of not, depending on how you feel about your dog being in the yard alone.

After a few days, you can stop walking

all the way to the elimination area and

stop giving her the command to eliminate.

Just open the door and walk halfway to the area. If she eliminates, perfect, give her a reward!

Over the next few days, reduce the amount of steps you take towards the elimination area.

In about a week, you should be able to wait at the door while Caroline goes out to eliminate.

It’s okay to give her a treat after she returns, for now she knows the treat is for eliminating, not for returning.

Some dogs learn to ring the bell to get you to interact, but they don’t need to eliminate. Keep a log of feeding and elimination. This will help you recognize the times she needs to go outside. If Caroline bumps the bell when she does not have to eliminate, she is telling you that she wants more mental and physical stimulation. Consider taking her for a walk or holding a short training session to stimulate her!

Print This Post Print This Post

Happy Training!

Alan J Turner

Companion Animal Behavior Counselor – Canine Specialization

How’s Bentley Memphis TN

Private and Group Puppy Obedience Courses

Why Use a Crate? Puppy Confinement & Crate Training Overview

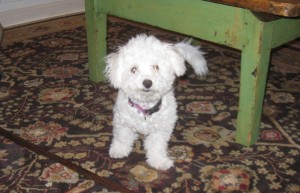
Bichon1Dogs are den animals and contrary to misconceptions, (when introduced and used properly), dogs will readily enter their crates and relax, regardless of the level of activity near the crate.

Dogs should never be crated or left unsupervised while fitted with any types of harnesses or collars, except a break-away collar.

Please fit your dog with a break-away collar for any events or activities that do not include direct supervision by a responsible adult.

Here are some examples of why and when to use a crate.  Use a crate:

  • for house training
  • to protect your property
  • to keep your dog safe
  • when traveling
  • for overnight outings
  • to rotate two dogs while training
  • for stays at vet clinics, groomers
  • to provide a den or safe spot for resting
  • to restrict dogs’ access to visitors
  • to limit activity during medical recovery periods
  • to give yourself a break

Confinement Overview

During my consultations with clients, I meet people who use laundry rooms, garages or back porches instead of crates. Some in this group report that their dogs constantly bark or whine. What they don’t realize is that dogs, like humans, are social mammals.

Most dogs want to be near us! A simple solution is to kindly introduce the dog to a crate and place the crate in a room with people. This often solves the barking problem.

Opposition to the proper use of crates is more often a reflection of how we feel about confinement (as humans).

Millions of dogs live full, happy lives with a crate as part of their daily routines.

If you are opposed to crating your unsupervised dog, use other, less effective, confinement tools such as laundry rooms, baby gates and exercise pens.

If you don’t use any barriers, expect problems with house training. Expect soiled carpets and destruction of your property.

Many people only confine their dogs when they are away or at night. Pups and dogs normally relax when away from their people in these low activity situations.

These same dogs may bark and whine if confined when their people are home and moving about.

This is because the dogs were not introduced to the concept of being confined when people are home and active. More than likely the dogs were placed in the crate immediately before the people left the house or went to bed.

A crate trained dog:

  • will not eliminate in the crate
  • readily enters the crate when asked
  • relaxes in the crate when alone in the home
  • relaxes in the crate when people are home and active
  • relaxes in the crate when other animals are not crated

Potty Accidents Inside? Don’t Kick the Dog! Clean Up and Smile!

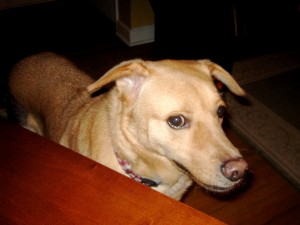
Yellow Lab MixI promote no suggestions to interrupt a dog during elimination. Instead, focus on preventing accidents. Keep a log. Watch your pup closely. Observe your dog’s behavior when he eliminates outside so you will recognize signs of “hunting for a location” like sniffing, and circling.

When you notice any pre-elimination behaviors while you are inside, tell your pup, “let’s go potty”, pick up your puppy and carry him outside to the desired location.

I know some very reliable sources instruct owners to kindly interrupt their untrained puppy (if they catch him in the act) and then take him outside.

The suggestions include actions such as softly clapping your hands, saying “ehh ehh”, shaking a can with pennies, or even tossing a magazine or keys on the floor beside the pup. I don’t like any of these suggestions. Some pups are confident and others are shy and some are in-between. The same interrupter will be received differently by each pup.

If the interrupter you choose terrifies your pup, you might as well have kicked your dog.

If your pup is confident and playful, he might respond to interrupters as Bentley did –gleeful fleeing while peeing!  Yikes!

Another point to consider is this. If people are instructed to use some sort of mild interrupter to reduce behaviors, what will their next choice be when the interrupter fails to reduce the behavior?  I know what their choice will be because I am no different. My next choice would be stronger interrupters – which will certainly hamper the house training process.


I’m not sure why professionals who suggest interrupting don’t clarify their suggestions with this statement:

“Interrupters will not hasten the house training process. At best, interrupters will stop the dog in the act and you’ll have a smaller area to clean. At worst, interrupters will teach your dog to fear you and to hide from you when he eliminates”.

Clean Up

Expect accidents. No matter how careful you are, there will be occasions when your pup piddles and poops on your floor. It’s nobody’s fault. It happens. The damage is done.

Try not to fuss at your spouse or your kids, yourself or your pup. Just remember, if it happens frequently, you should review this guide and make changes that will reduce your pup’s opportunities to eliminate inside.

Clean the affected area with an enzyme-based, odor neutralizer.

Any commercial product that specifically states “For Pet Odors” is sufficient.

It takes several days for the enzymes to break down the odors. Your dog will smell the urine and be attracted to the area long after you apply cleaners.

Whenever liquids are spilled on carpet, the carpet pad acts as a sponge and soaks up the liquid.

The urine is spread over a larger area in the pad than is indicated by looking at the carpet.

Generously apply the cleanser to an area equal to twice the size of the observable stain.

If you have “pet proof” padding installed under your carpet, the affected area underneath the carpet will be even larger. Pet proof padding has a plastic coating on top to prevent liquids from seeping into the pad. This causes the urine to spread underneath the carpet until it is absorbed by the carpet backing, instead of the pad.  Treat a much larger area than is indicated by the wetness of the carpet fibers.

If you don’t have any cleanser, use a solution of 1 part distilled, white vinegar to 4 parts water. Do not use ammonia based cleaners. Ammonia breaks down into urea, which is a component of urine.

Do not use any cleaners that are not specifically marketed to neutralize odors. Non specific cleaners will set the stain and the smell.

Before you hire a carpet cleaning service, verify that they use an odor neutralizer with enzymes.

If the smell is set into the flooring, your dog will always be drawn to eliminate in that area. It’s impossible to remove urine odors from concrete and other non-sealed, porous flooring materials. If you have any permanently-soiled areas, you may need to deny your dog unsupervised access to that area forever.

Happy Training!

Alan J Turner – How’s Bentley – Memphis

Companion Animal Behavior Counselor – Canine Specialization